Snaps 101
Recently I completed a couple of Baby Surprise Jackets that were designed by Elizabeth Zimmermann. It's this awesome pattern done all in garter stitch, knitted flat and then magically transformed into the most adorable sweater with minimal sewing involved. The pattern calls for buttons and in fact, instructs you to make button holes on BOTH sides of the sweater so that you can place the buttons on the correct size after you know the sex of the baby. (Can you say, Run on sentence?) Anyhoo, I was spending alot of time searching for buttons and struggled with finding ones I liked. I wanted buttons with shanks but the selection was kind of blah. Someone suggested using a small clear button sewn on under a regular button, kind of acting as a shank but still allowing the sweater to be buttoned easily. I liked the idea but I was nervous about the choking hazard that buttons posed. I opted to go with snaps.
I had never used snaps, well I've used them, but I've never "installed" them. I went to my local Joann's. Um, not so easy to pick out snaps. The issue I ran into was that there are quite a few different snaps and most require a specific tool to install. So for me, I picked out 3 different types of snaps and needed three different tools.
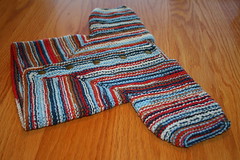
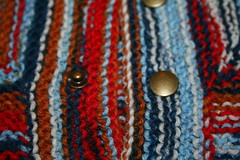
This is one of the sweaters that I used buttons on. I chose these particular buttons because they reminded me of the rivets on jeans. They just seems to go well with the colorway.
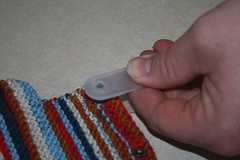
The pattern itself calls for button holes that are made by doing YO, K2tog. Instead of doing that I substituted 2 purl stitches. They didn't change my stitch count and left no holes but by doing them on both sides of the sweater I was able to easily place my snaps. If you need to see a close up of any of these photos you can simply click on them.
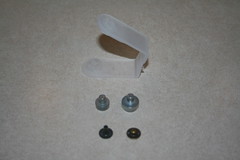
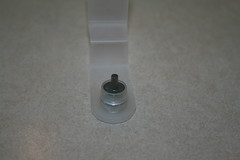
These are the parts of the snap that will be on the public side of the sweater. This is the top of the snap, the bottom part of the snap, and two interchangeable pieces that fit into the clear plastic holder.
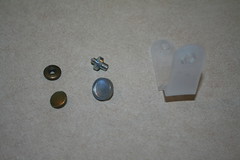
The set of tools come with instructions that not so helpfully label the snap parts a,b,c and d. It then labels the interchangeable tools A,B,C and D. The clear plastic "holder" is labeled F. It took me a few minutes to figure out what was what.
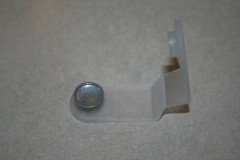
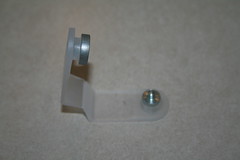
This is a picture of tool A installed into tool F. This is the piece that will hold your snap front. The smooth part that is on the public side of the sweater.
This is a picture of tool B installed into tool F. They both fit in well, if not snug. I had to use a something to push them back out... I used a fork;-)
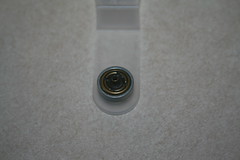
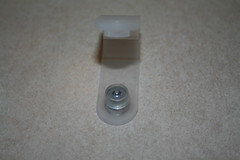
Below is snap part 'a' sitting on tool A in tool F. It's somewhat comical, don't be scared! This part in simply sitting in the mold.
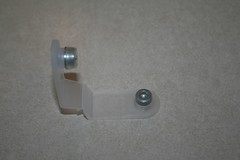
Now you can see snap part 'b' attached to tool B. This is actually fitted on. It has some room to wiggle and I tried to center it as much as possible because I'm a perfectionist.
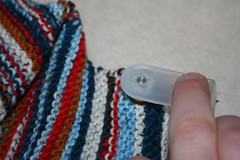
The most important thing to keep in mind at this point is that the public side of this snap is on the bottom of tool F. You MUST place your fabric on top of the tool with the front facing downward. That means that you will be looking at the back of your work while installing your snaps. Take a minute to double and triple check at this point. Don't rush and be careful on EACH of your snaps. Remember the two purl stitches that I used instead of making a button hole? I placed the shaft of the snap in between those two stitches. If you look very closely you can see the shaft.
Here you can see tool F closed down over my fabric. Again, take your time and make sure you are working on the correct side. There is NO GOING BACK with these snaps!
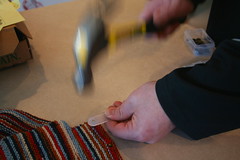
Working on a hard and durable surface, wearing safety glasses (you only have two eyes), strike the surface of tool F a couple of times with fairly good force. When you open up tool F the front part of the snap will be free but you may need to work the back side loose.

Now we move onto the back portion of the snap. This is the part of the snap that is the receptacle of the snap, so to speak. These are the parts and tools that I used. For this we are using tool F along with tools C & D and snap parts c & d.
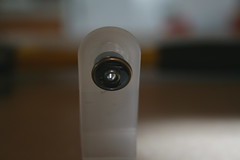
This is tool D nested into tool F. This piece has a clear rubberized ring around it that will actually hold snap part d in place.
Here we have tool C.
This is tool D with snap part d placed into it.
At this point you will need to place your fabric on snap part d. Again you are using those purl stitches for guidance. In this photo you can easily see the shaft of snap part d. You will have the right side of the fabric face up for this part. If you take a minute to look at the way you want your sweater to close this should make sense.
Snap part 'c' will be placed on top of your fabric over the shaft of snap part 'd'.

You will then lower tool F down, nesting tool C to snap part 'c'.
Once again you will be striking tool F... safety glasses and firm surface warnings given.
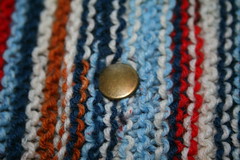
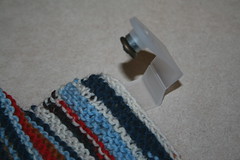
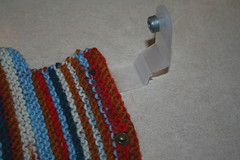
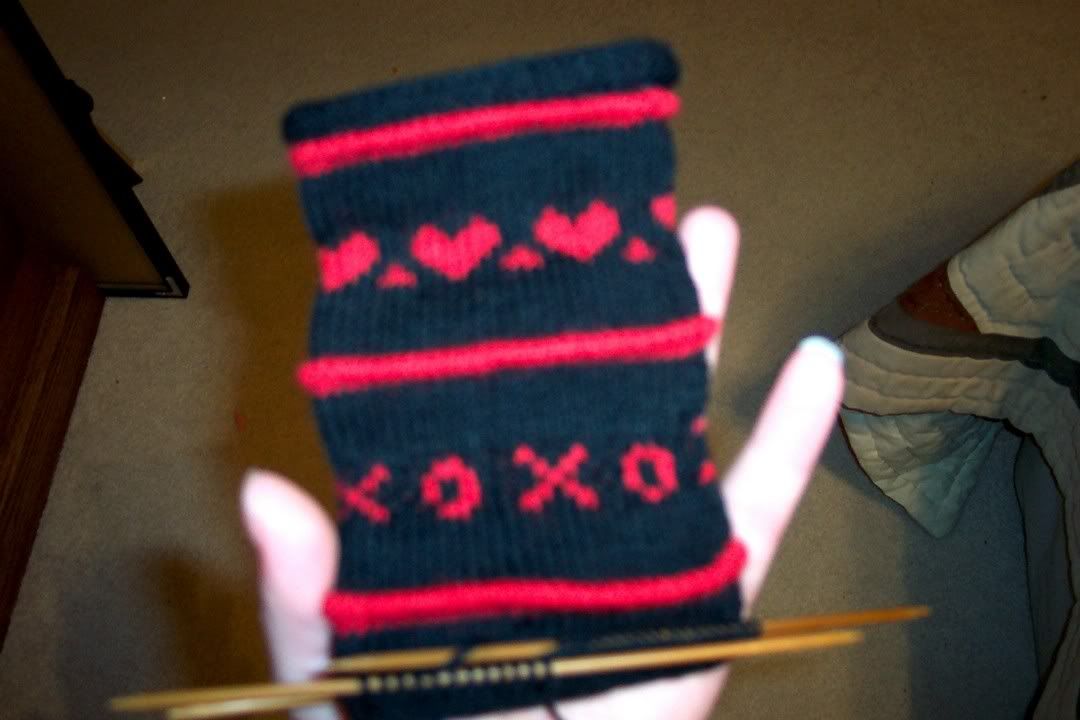
Ta-Da! Here are the snaps as shown from the front of my Baby Surprise Jacket!
Now here are some things to consider...
1. I used Mini Anorak Snaps (15/32") along with the appropriate tool.
2. I believe these snaps to be permanent.
3. The snaps will be tight at first. I'm sure they will loosen up over time. Because I'm just not that patient I used a piece of wax paper. I closed my snaps with the wax paper in between a couple of times. It really helped.
4. I don't think that the snaps should be opened by simply yanking on the sweater. You will still want to ease them open. All you need to do once they are loose is to use the tip of your finger between the snaps and they should pop open fairly easy.
So there you have it. I hope that this tutorial will help someone to jump into the world of snaps. I'm here to help if you have other questions. I will be posting another tutorial on a different type of snap soon so keep checking in!
posted by Erica @ 8:05:00 PM
![]()
![]()


2 Comments:
Thanks so much for the snaps tutorial. I want snaps but only have access to the kind you sew on. Not always good for sweaters. This was great information
I had no idea what adding a snap involved.
My god-daughter is due in July and I was considering snaps for garments for her baby.
I may have to investigate the snaps which are sewn to the garment as I don't think I'm the hammering kind.
Looking forward to reading about the next snaps you try.
Post a Comment
<< Home